
TL;DR
A closet can become a great recording spot if you control reflections and noise. The key is balancing absorption, strategic mic placement, and proper ventilation—plus knowing when to just move the rig out of sight.
Ever tried recording in a tiny closet? It often sounds more like a box than a studio. But with the right tweaks, that cramped space can transform into a surprisingly effective vocal booth. The secret isn’t just in adding foam—it’s about smart placement, reducing reflections, and managing noise leaks.
This guide will show you how to turn your closet into a clean, quiet, and professional-sounding space—without breaking the bank or tearing down walls. Whether you’re doing voice-over work, streaming, or just want better audio, these tips make a real difference.
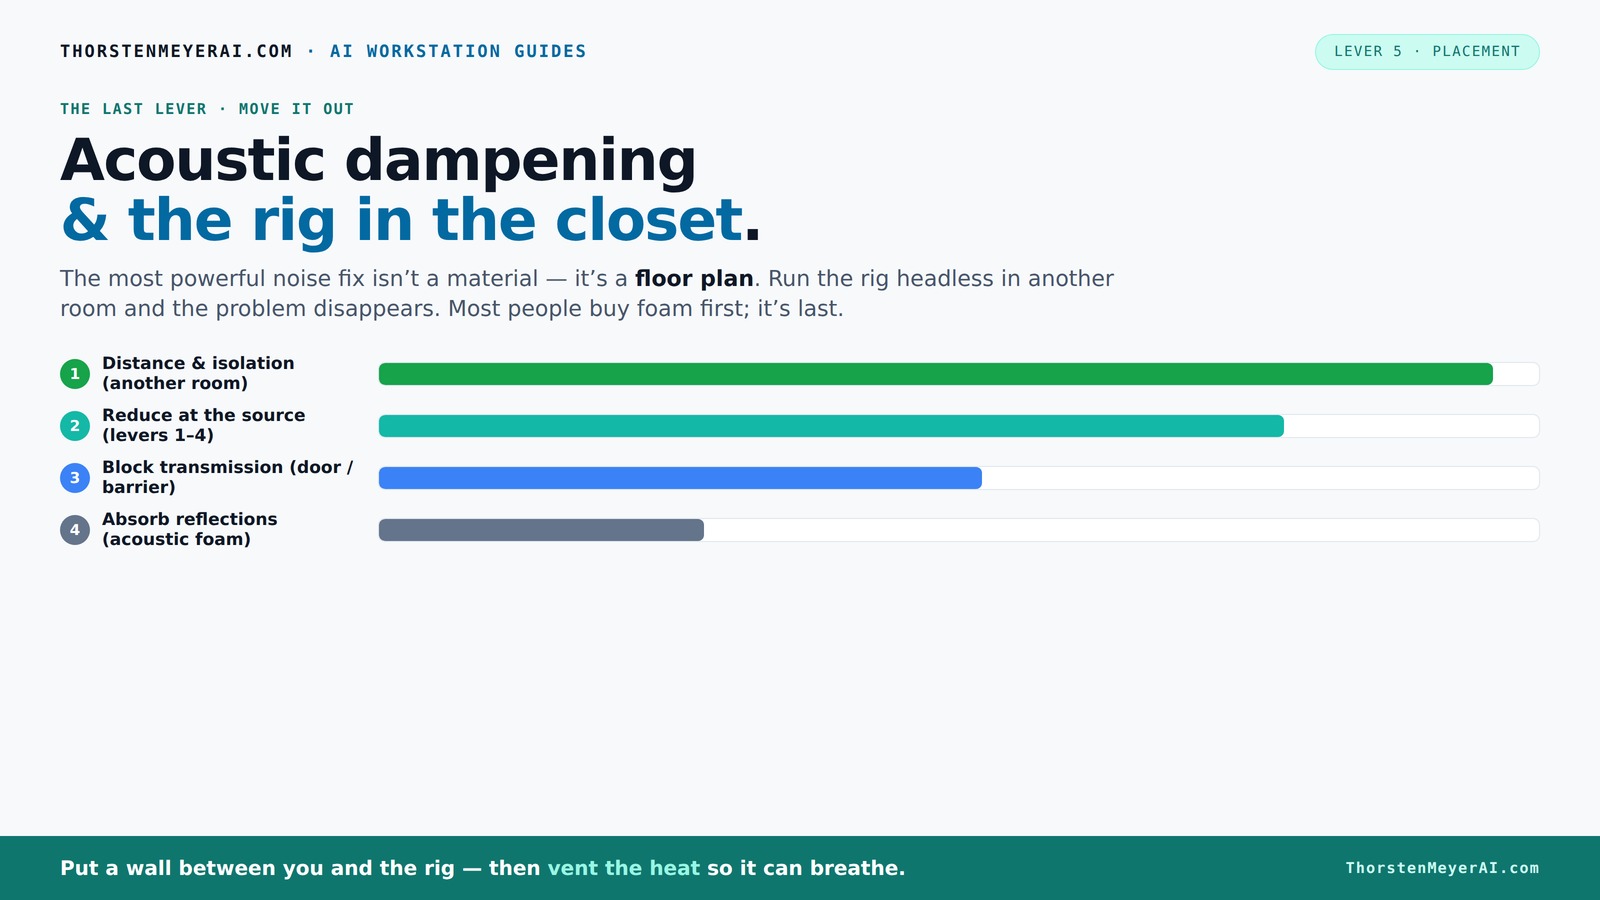
Acoustic dampening
& the rig in the closet.
The most powerful noise fix isn’t a material — it’s a floor plan. A rig you can’t hear because it’s in another room beats any amount of foam. Tap the approaches in Part 1 to see what actually works.
(another room)
(levers 1–4)
(door / barrier)
(acoustic foam)
Contain the noise, not the heat
Key Takeaways
- Prioritize distance and isolation over adding foam for effective noise reduction.
- Place your mic carefully—off-center, away from reflective surfaces, with a reflection filter behind it.
- Seal gaps around doors and windows to prevent sound leaks, using weatherstripping or blankets.
- Use bass traps in corners to control low-frequency resonance and avoid muddy recordings.
- Ventilation is key—use quiet fans or ducting to keep your rig cool in a closet setup.

Focusound 52 Pack Acoustic Foam Panels 1" x 12" x 12" Sound Proof Foam Panles Soundproofing Noise Cancelling Wedge Panels for Home Office Recoding Studio with 300PCS Double-Side Adhesive
Soundproofing - Acoustic foam panels triangular grooves structure for better noise absorption, helps to reduce and absorb unwanted...
As an affiliate, we earn on qualifying purchases.
As an affiliate, we earn on qualifying purchases.
Why Acoustic Dampening Matters More Than Noiseproofing in Small Spaces
Acoustic dampening focuses on shaping the sound inside your space—making it clearer and less echoey. It’s different from soundproofing, which tries to block noise from escaping. For a closet studio, controlling reflections and flutter echoes is your first step.
When you reduce internal reflections, your recordings become more intelligible because the sound waves don’t bounce around and create muddiness. This is crucial for vocals, where clarity is paramount. Sealing gaps and adding soft materials minimize sound leaks, which not only improves your recording’s quality but also prevents disturbing others nearby. The tradeoff is that over-dampening can make the space sound dead or unnatural, so it’s about finding the right balance that preserves some liveliness without excessive echo.
So, focus on what makes your voice sound best first—then worry about noise leaks if you need total isolation.

Professional Studio Recording Microphone Isolation Shield, Pop Filter,High density absorbent foam is used to filter vocal. Suitable for Blue Yeti and other condenser microphones (AO-504 With Stand)
♪【The package contains】♪: Microphone Isolation Shield x 1, Metal Thread Adapter x 2 (Adapt most microphones), Adjustable Stand...
As an affiliate, we earn on qualifying purchases.
As an affiliate, we earn on qualifying purchases.
The Best Placement for Your Microphone in a Closet Booth
Where you place the mic affects how much room sound gets into your recordings. The golden rule? Keep the mic as far from reflective surfaces as possible. Position it so it’s not pointed directly at walls or shelves that bounce sound back.
Imagine a typical closet: shelves, a door, and perhaps a hanging rod. Place your mic about 6-12 inches away from your mouth, slightly off-center, and angle it toward your face. Use a reflection filter behind it to block bounce and avoid capturing echoes.
This placement minimizes the mic’s pickup of unwanted room reflections and helps focus on your voice, resulting in clearer recordings. The tradeoff is that too much distance can introduce other noise or lessen proximity effect, so it’s about finding that sweet spot that balances closeness and room sound. Experimenting with mic angles and distances helps you understand how your space interacts with your voice, leading to a more natural and professional sound.
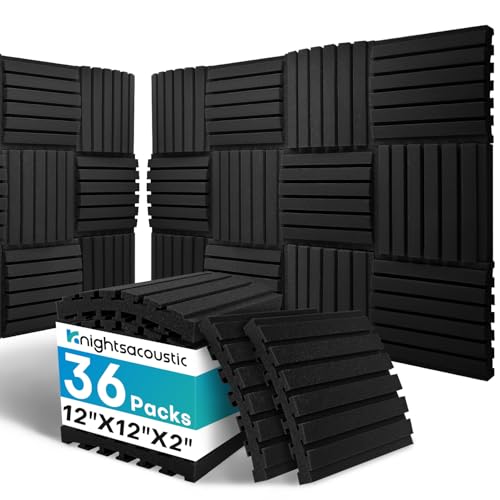
36Packs Curved Sound Proof Foam Panels for Walls, 2" Acoustic Panels Sound Absorbing Dampening, Soundproofing Noise Reducing Cancelling Treatments for Home Office Recoding Studio Decor, 2x12x12" Black
PATENTED DESIGN: Engineered with advanced acoustic foam panels featuring a unique curved groove design, these panels offer enhanced...
As an affiliate, we earn on qualifying purchases.
As an affiliate, we earn on qualifying purchases.
How to Cover Hard Surfaces Without Overcrowding the Space
Hard surfaces like shelves, doors, and walls create strong echoes. Covering these with foam or blankets reduces flutter echo and improves sound quality. But overdoing it can make your space feel cramped.
Start by adding sound-absorbing panels on the wall behind your mic and on the ceiling. Use thick foam—around 2 inches for small closets. For larger rooms, go for 4-inch panels to tame low frequencies.
In a typical DIY setup, a few wall-mounted foam panels, a thick blanket over the door, and a soft rug on the floor can turn a closet into a vocal haven [2][4].
Adding soft materials prevents sound waves from bouncing endlessly, which can cause muddiness and reduce clarity. The key is strategic placement—covering only the most reflective surfaces—so you don’t sacrifice too much space or make the environment feel oppressive. This balance ensures your recordings sound professional without creating a claustrophobic atmosphere.

TroyStudio Portable Vocal Booth, Large Foldable Microphone Isolation Shield, Music Recording Studio Sound Echo Absorbing Box, Desk & Stand Use Reflection Filter with Thickened Dense Acoustic Foam
【BASIC INFO】: Inside size after setup: 8'' (L) X 10'' (W) X 12'' (H), large space for various...
As an affiliate, we earn on qualifying purchases.
As an affiliate, we earn on qualifying purchases.
Sealing the Door and Common Weak Points for Better Isolation
Doors are usually the biggest sound leaks in a closet booth. Seal gaps around the frame with weatherstripping or acoustic sealant. For a quick fix, hang a heavy blanket or foam panel over the door.
In one case, a voice actor sealed their closet door with foam strips, reducing noise bleed by 60%. Adding a door sweep further blocked sound leaks [1][7].
Remember: sealing gaps and using soft materials around the door dramatically reduces outside noise and prevents your voice from escaping into noisy areas.
Proper sealing is critical because even small gaps can let in or let out a significant amount of sound, undermining your efforts to isolate your space. While temporary solutions like blankets are quick, investing in weatherstripping or door seals ensures more consistent performance. The tradeoff is that sealing can make the space feel more enclosed, so choose materials that balance sound blocking with comfort.
Controlling Low-End Resonance and Standing Waves in Tiny Rooms
Small rooms often develop bass buildup, making voices sound muddy or boomy. To fix this, add bass traps in the corners—thick foam or specialized traps that absorb low frequencies.
For example, placing a bass trap in each corner of your closet can cut low-end resonance by up to 50%. This makes your voice sound clearer and more natural.
If you notice your recordings are boomy or hollow, try adding bass traps and experimenting with mic position until the sound feels balanced.
Controlling low-end resonance is vital because it prevents your recordings from sounding muffled or distorted. Bass buildup occurs because low frequencies tend to accumulate in corners and along walls, creating standing waves that color your sound. By strategically placing bass traps, you absorb these problematic frequencies, resulting in a more balanced and natural tone. The tradeoff is that bass traps can take up space and add cost, but they are often essential for achieving professional-quality recordings in small, reflective environments.
Ventilation Tips for Closet Rigs: Keep It Cool Without Noise
Hot, enclosed spaces trap heat and can damage your gear over time. The trick? Provide ventilation that doesn’t compromise soundproofing. Use ducted fans, vent holes, or small exhaust fans with sound dampening.
In a recent setup, a creator installed a quiet, thermostat-controlled exhaust fan, keeping the closet cool while maintaining noise isolation. This setup prevents overheating and keeps your rig running smoothly [3].
Remember: good airflow is vital. Otherwise, your PC or GPU could throttle or overheat, defeating your noise-reduction efforts.
Proper ventilation ensures your equipment remains within safe operating temperatures without introducing unwanted noise. The tradeoff is that any opening can be a potential leak, so integrating sound dampening elements with venting—like duct silencers or acoustic baffles—is key. This way, you maintain a cool system environment and preserve the integrity of your acoustic treatment.
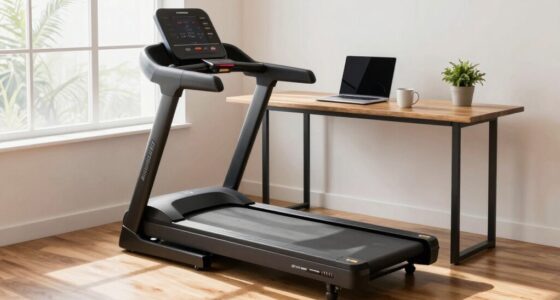
How Moving Your Rig Elsewhere Is the Easiest Sound Solution
The simplest way to reduce noise? Put the rig in another room. If you can run it headless—controlled over network—you avoid most acoustic issues altogether. Your laptop or desktop stays quiet, while the noisy machine roars in a closet or basement.
For example, a streamer I know keeps their gaming PC in a closet, connected via Ethernet. Their microphone and camera are in the main room, unaffected by the rig’s noise. It’s a simple but game-changing move.
This method works especially well for AI workstations, which are often accessed remotely anyway.
Moving your rig outside your recording space minimizes sound contamination and frees up your environment for better acoustics. The main tradeoff is the need for reliable network setup and remote management skills, but the benefits in noise reduction and workspace flexibility often outweigh these challenges.
Why a 'Rig in the Closet' Can Be Your Best Noise Solution (And Its Caveats)
Placing a noisy, heat-generating machine in a closet is highly effective at sound reduction. But it’s a balancing act—heat must escape, or your rig will throttle. Ventilation, fans, and sometimes even ducting become essential.
If you install a fan system with temperature controls and proper airflow, you can keep the rig cool and quiet. But ignore ventilation, and you risk overheating, which can cause damage or performance drops.
In practice, a well-ventilated closet setup with active airflow can keep a 600W GPU rig running in a sealed space without issues—if you listen to the signs and maintain airflow.
The main consideration is ensuring your setup doesn't trap heat, which can lead to thermal throttling or hardware failure. Proper airflow and monitoring are required, but with these in place, a closet rig can be an effective, space-saving solution for noise reduction—saving you from expensive soundproofing projects or bulky enclosures.
Frequently Asked Questions
Do I need soundproofing or just acoustic treatment?
For most home setups, especially in small rooms like closets, acoustic treatment is enough. It controls echo and reflection, making your recordings clearer. Soundproofing is more complicated and usually unnecessary unless you need complete isolation from outside noise.
Where should I put the mic in a closet booth?
Position your mic about 6-12 inches from your mouth, slightly off-center, and angled toward you. Avoid pointing it directly at walls or shelves. Use a reflection filter behind the mic to minimize bounce and echo.
How do I stop sound leaking through the door?
Seal gaps with weatherstripping or acoustic sealant. Hang a blanket or foam panel over the door. For better results, install a door sweep and consider adding a heavy curtain or draft blocker to block sound leaks.
Are foam panels enough for a closet studio?
Foam panels help reduce echo and flutter but aren’t enough alone. Combine them with sealing gaps, covering hard surfaces, and adding rugs or blankets for the best sound quality.
Can I run a high-power rig in a closet without overheating?
Yes, if you install proper ventilation—quiet fans, ducting, or exhaust systems—and monitor the temperature. Active airflow keeps your system cool and prevents throttling or damage.
Conclusion
Transforming a closet into a sound-friendly space isn’t about throwing foam everywhere. It’s about strategic placement, sealing leaks, and managing heat. When done right, your tiny space can produce clear, professional-quality audio.
Think of your closet as a blank canvas—you just need to add the right materials and techniques. The result? Crisp vocals and a quiet, comfortable workspace. Now, go build that perfect little studio.